
When to Plant Kūmara in New Zealand: Growing Sweet Potato From Slips
Updated October 2026
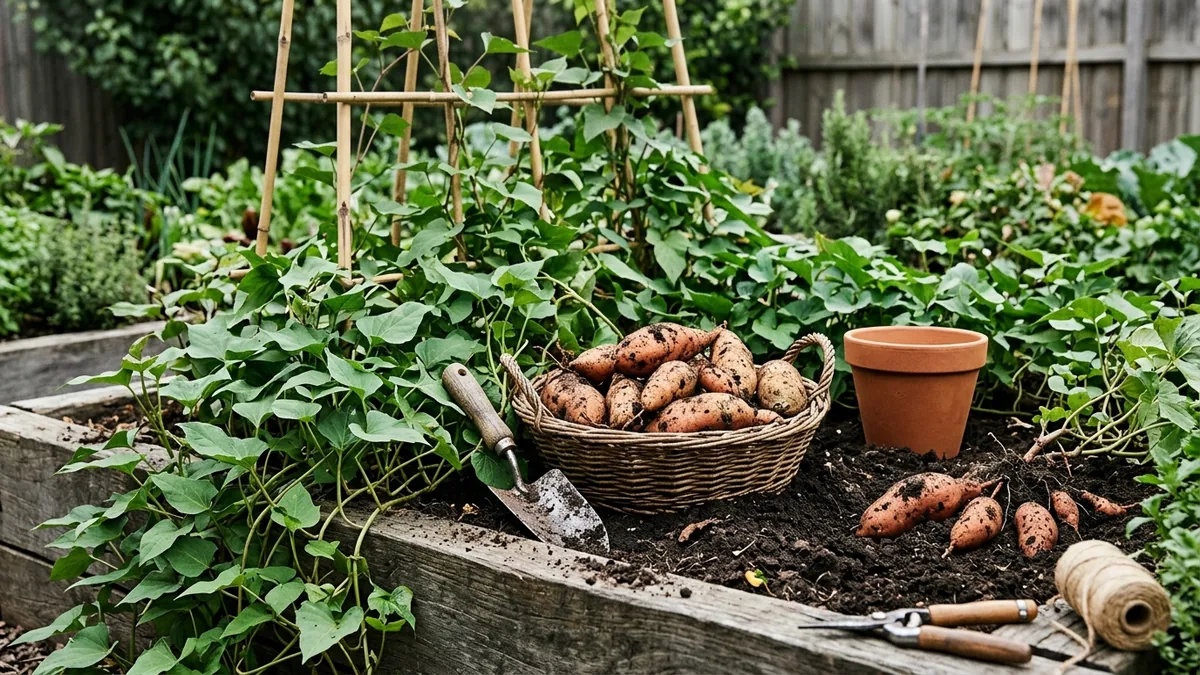
Slips, a warm long season, mounding, even watering, and curing for sweetness and storage
Kūmara is a warm-season root crop grown for its sweet, starchy tubers and its vigorous trailing vine. It is culturally important in New Zealand, with a long history here, and Northland is the heartland of the commercial crop. Kūmara is not a true potato and is not grown from seed. Instead you plant slips, which are rooted shoots, and the plant rewards you with heavy yields even from fairly poor soil, as long as it gets heat and a long frost-free season.
The vines sprawl across the ground and smother weeds while the tubers swell underground. Give kūmara full sun, warm soil and room to roam, then leave it largely alone. The two things that make the difference between a bland, starchy harvest and a sweet, creamy one are a long enough warm season and a proper curing step after lifting.
🌱 Plant profile: Sweet Potato, with sowing times for your region, companion plants and common pests.
Growing From Slips
A slip is a rooted shoot that sprouts from a kūmara tuber. You can buy slips from garden centres, but they are easy and cheap to grow yourself, and growing your own lets you choose your variety and start at the right time for your garden.
How to make your own slips
- Choose a healthy, firm kūmara. Either half-bury it in moist sand or seed-raising mix, or suspend the lower half in a jar of water using toothpicks.
- Keep it warm, around 24 to 29 C, in a bright spot. Shoots sprout over a few weeks.
- When the shoots reach about 15 to 20 cm, twist or snap them off the tuber.
- Root the slips in a glass of water or pot them up in moist mix. Roots form within a week or so.
- Plant out once the soil is warm and frost has passed.
Start the process about 6 to 8 weeks before your planting-out time. One tuber can throw many slips over several weeks, so keep snapping off new shoots as they appear.
Buying slips
If you would rather not grow your own, garden centres sell kūmara slips. Look for fresh slips with healthy green leaves and plant them within a few days. If they have to wait, stand them in a glass of water, where they will start to root.
How to plant kūmara slips
- Wait for warm soil. Plant once frost has passed and the soil is consistently above 18 C, in the planting months for your region in the table below.
- Build mounds or ridges. Make raised mounds or ridges about 20 to 30 cm high in full sun, in loose, free-draining soil.
- Plant deep. Push each slip in so only the top 2 to 3 leaves sit above the soil. The buried stem grows roots and tubers.
- Give them room. Leave space for the vines to run. The slips calculator below works out how many slips a bed takes at your chosen spacing.
- Water in. Water well after planting and keep the soil evenly moist while the slips establish.
When to Plant Kūmara in Your Region
Kūmara slips go in once the soil is warm and frost has passed. These are the planting months for each of our nine New Zealand regions from our planting data, with the average frost dates from our frost dates page where frost matters. Each region links to its vegetable planting calendar, and the Kūmara (Sweet Potato) plant page has spacing, companions and care notes for your region.
| Region | Plant slips | Local note |
|---|---|---|
| Northland | October and November | Effectively frost free. Labour Weekend in late October is the traditional start in the north. |
| Auckland | October and November | Effectively frost free. Labour Weekend in late October is the traditional start in the north. |
| Waikato & Bay of Plenty | October and November | Average last frost about 25 September and first frost about 5 May. |
| Central North Island | November | Marginal. Rotorua and warm lake edge sites only; use black plastic mulch or a tunnel house. |
| Wellington & Lower North Island | November and December | Average last frost about 30 August and first frost about 10 June. Wait for warm soil before planting. |
| Nelson & Marlborough | November and December | Average last frost about 20 September and first frost about 10 May. |
| Canterbury | November | Average last frost about 10 October and first frost about 20 April. Use the warmest, most sheltered bed. |
| Otago & Southland | December | Average last frost about 25 October and first frost about 5 April. Warm the soil with black plastic and lift before the first frost. |
| Central Otago | December | Average last frost about 5 November and first frost about 25 March, the shortest season of our regions. Warm the soil and use cloches early on. |
Labour Weekend in late October is the traditional time to plant kūmara in the north, and it sits inside the October and November window our data gives Northland, Auckland, Waikato and the Bay of Plenty. Further south the start moves later. Wellington and the Nelson and Marlborough region plant in November and December, Canterbury in November, and Otago, Southland and Central Otago in December. In the Central North Island kūmara is marginal and best kept to Rotorua and warm lake edge sites, planted in November under black plastic mulch or in a tunnel house.
A Warm, Long Season
Kūmara needs about 4 to 5 months, roughly 100 to 150 days, of warm, frost-free weather to size up. It loves heat and grows best when the soil is consistently above 18 C. Cold, wet soil makes slips sit and rot rather than strike, so there is no benefit in planting early.
In cooler or short-season areas, including most of the South Island, you can still grow a crop with care. Warm the soil with black plastic or mulch before planting, use cloches early in the season, and choose short-season varieties. Kūmara is not frost tolerant at either end, so plant only after the last frost and lift before the first cold snap.
Our frost dates show how tight the season gets in the south. Canterbury's average frost window runs from about 10 October to 20 April, so a November planting has around five months before the first autumn frost. In Otago and Southland the first frost arrives around 5 April, and in Central Otago around 25 March, so a December planting there has four months or less, short of the roughly 150 days our plant data allows for the crop. Use the warmest bed you have, warm the soil before planting, and lift before the first frost even if the tubers are on the small side.
Slips Calculator
Tell the calculator the size of your bed and it estimates how many slips you need. It assumes rows about 75 cm apart, with slips spaced along the row at the spacing you choose. Row spacing stays fixed at about 75 cm.
Add about 10 percent spare slips, as not all of them strike. Rows are assumed at 75 cm apart.
Position and Soil
Give kūmara full sun and the warmest spot you have. It likes loose, free-draining sandy loam and slightly acidic to neutral soil, around pH 5.5 to 6.5. Heavy clay restricts the tubers and makes them forked and small, so loosen the bed deeply and add compost and grit if your soil is heavy.
Avoid very rich, high-nitrogen soil. Too much nitrogen pushes lush leafy vine at the expense of tubers, so feed lightly. On reasonably fertile ground you often need no extra feeding at all.
If you do feed, use a potassium feed rather than a nitrogen one. Our plant data recommends potassium for tubers, and nitrogen grows vine over tuber.
Mounding and Ridging
Plant slips into raised mounds or ridges about 20 to 30 cm high. Mounding improves drainage, warms the soil and gives the tubers room to form and expand. It is one of the most useful things you can do for a kūmara crop.
Push each slip in deeply, leaving only the top 2 to 3 leaves above the soil. Buried stem readily grows roots and tubers, so deep planting pays off.
Watering
Keep the soil evenly moist while the slips establish and through the main growth period. Even moisture gives the best-sized tubers. In the last 3 to 4 weeks before harvest, reduce watering to firm up the skins and improve storage.
Avoid two extremes. Waterlogged soil rots the tubers, and erratic wet-then-dry cycles cause cracking as the tubers swell in sudden bursts. Lift and redirect the vines occasionally so they do not root at every node, which otherwise scatters the plant's energy into many small tubers.
Growing in Containers
Kūmara grows well in a large container, half-barrel or grow bag of at least 40 litres. Plant one to two slips in a free-draining mix, set it in full sun, and water consistently through the season. Bush or compact varieties suit pots far better than rampant vining types, which need a lot of room to roam.
Our plant data rates kūmara as only partly suited to containers and calls for a pot of at least 50 cm that is also deep, because the tubers need room to form. A container dries out quickly in summer, so water steadily while the vines establish, then ease off a little as the tubers form so they do not crack. Lift potted kūmara before the first frost, just as you would in the garden.
Varieties
| Variety | Flesh / skin | Notes |
|---|---|---|
| Owairaka Red | White flesh, red skin | The classic New Zealand kūmara, the most widely grown. Reliable and well-suited to warm gardens. |
| Toka Toka Gold | Gold flesh, golden skin | A popular New Zealand gold kūmara, sweet and creamy when cured. A favourite for roasting. |
| Beauregard | Orange flesh, light skin | Widely grown and reliable, with good yields. About 90 to 110 days, a solid first choice. |
| Northern Star | White flesh | A good keeper bred in New Zealand. Drier, starchier texture closer to a regular potato. |
| Murasaki | White flesh, purple skin | Japanese type with a nutty, chestnut flavour and firm texture. Striking on the plate. |
| Georgia Jet | Orange flesh | Early and quick, the pick for cooler and shorter seasons where time is tight. |
When to Harvest Kūmara
Kūmara is ready when the lower leaves start to yellow, once the tubers have sized up, or simply before the first frost in cooler areas. Gently fork into the edge of a mound to check tuber size before committing to lifting the whole plant.
Our plant data allows about 150 days from planting slips to lifting. Counted from the planting months above, a Labour Weekend planting in the north is ready to check from about late March, and a November planting, whether in the north, Wellington, Nelson or Canterbury, from about April. In Otago, Southland and Central Otago a December planting runs into the autumn frosts before it reaches 150 days, so lift before the first frost. A healthy plant gives around 1 to 2 kg of tubers.
Lift carefully on a dry day. Start digging well away from the stem, as tubers can extend 30 cm or more from the base. The skins are fragile and bruise easily, so handle them gently and do not scrub them hard. Brush off loose soil and let them dry, but do not wash them before curing.
Curing and Storage
Curing is the key step for both sweetness and storage. Cure freshly dug tubers for about 4 to 7 days in warm, humid conditions, roughly 27 to 30 C with high humidity around 85 to 90 percent. This heals the skins and converts some of the starch into sugar, which is exactly why cured kūmara tastes sweet and creamy rather than bland.
After curing, store the tubers somewhere cool but not cold, around 12 to 15 C, in a dark, airy spot. Do not refrigerate them. Fridge temperatures cause chilling injury, giving a hard core and an off flavour when cooked. Cured tubers keep for months, and the flavour often improves over the first few weeks.
What to Plant With Kūmara
Our companion data pairs kūmara with beans, corn and marigolds. Leave plenty of space around the bed, because the vines sprawl across the ground as the tubers swell underground.
Region and season note
New Zealand runs on southern-hemisphere seasons. In the north, Labour Weekend in late October is the traditional time to plant kūmara, once frost has passed and the soil is warm. Harvest before the autumn frosts, roughly March to May. The South Island is marginal for kūmara and needs the warmest, most sheltered spot plus soil-warming tricks like black plastic and cloches.
Frequently Asked Questions
How do I make my own kūmara slips?
Take a healthy, firm kūmara and either half-bury it in moist sand or seed-raising mix, or suspend the lower half in a jar of water, in a warm spot around 24 to 29 C. Shoots sprout over a few weeks. When the shoots reach about 15 to 20 cm, twist or snap them off and root them in water or pot them up, then plant out once the soil is warm and frost has passed. Start about 6 to 8 weeks before your planting-out time. Use certified or healthy untreated tubers, as some supermarket ones are treated to stop sprouting.
When do I plant kūmara in New Zealand?
In the north, Labour Weekend in late October is the traditional time to plant kūmara, once frost has passed and the soil is warm. Our planting data gives Northland, Auckland, Waikato and the Bay of Plenty October and November, Wellington and the Nelson and Marlborough region November and December, Canterbury November, and Otago, Southland and Central Otago December. In the Central North Island it is marginal, with a November planting in warm lake edge sites only. Harvest before the autumn frosts, roughly March to May. The cooler South Island regions need the warmest, most sheltered spot plus soil-warming tricks. Kūmara is not frost tolerant and needs a long warm frost-free run of about 4 to 5 months.
Why is my kūmara all vine and no tubers?
Too much nitrogen is the usual cause. Rich, high-nitrogen soil pushes lush leafy vine at the expense of tubers, so feed lightly and avoid heavy nitrogen feeds. Vines that root at every node where they touch the soil also spread the plant's energy into many small tubers, so lift and redirect the vines occasionally. Full sun and a long warm season help the plant put energy into roots.
Why do I need to cure kūmara?
Curing heals the skins and converts some of the starch into sugar, which is why cured kūmara tastes sweet and creamy rather than bland and starchy straight from the ground. Cure freshly dug tubers for about 4 to 7 days in warm, humid conditions, roughly 27 to 30 C with high humidity around 85 to 90 percent. Curing also toughens the skins so the tubers store for months.
How do I store kūmara, and why not the fridge?
After curing, store kūmara somewhere cool but not cold, around 12 to 15 C, in a dark, airy spot. Do not refrigerate them. Fridge temperatures cause chilling injury, which gives a hard core and an off flavour when cooked. Cured tubers keep for months and the flavour often improves over the first few weeks.
Can I grow kūmara in a pot?
Yes. Use a large container, half-barrel or grow bag of at least 40 litres, with one to two slips in a free-draining mix, in full sun. Keep the water up consistently through the season. Bush or compact varieties suit pots better than rampant vining types, which need a lot of room.
How long does kūmara take to grow?
From planting slips, kūmara takes about 4 to 5 months, roughly 100 to 150 days, of warm frost-free weather to mature. Warmth speeds it up and cool conditions slow it down, so in cooler areas choose short-season varieties and warm the soil to make the most of the season.
When do you harvest kūmara in NZ?
Most kūmara is lifted from March to May, before the autumn frosts. Our plant data allows about 150 days from planting slips, so a late October planting in the north is ready to check from about late March, and a November planting from about April. Kūmara is ready when the lower leaves start to yellow, and in cooler areas lift before the first frost even if the tubers are small.
Can you grow kūmara in the South Island?
Yes, with care. Our planting data gives Nelson and Marlborough November and December, Canterbury November, and Otago, Southland and Central Otago December. The southern frost-free season is shorter than the roughly 150 days the crop wants, so use the warmest, most sheltered bed, warm the soil with black plastic, use cloches early in the season, choose a short-season variety such as Georgia Jet, and lift before the first frost.
How many kūmara do you get from one plant?
Our plant data puts a healthy plant at around 1 to 2 kg of tubers. Yields are best in full sun, loose mounded soil and a long warm season, and too much nitrogen gives lush vines with few tubers.
How deep do you plant kūmara slips?
Push each slip in deeply so only the top 2 to 3 leaves sit above the soil, into mounds or ridges about 20 to 30 cm high. The buried stem grows roots and tubers, so deep planting pays off.
See also: How to Grow Potatoes and How to Grow Pumpkin
See also: Sweet Potato in the Plant Library
Plant profile
The sweet potato profile has sowing times for your region, companion plants and common pests.